| Categories | Power Tool |
|---|---|
| Download File |
|
| Document File Type | |
| Copyright | Attribution Non-commercial |
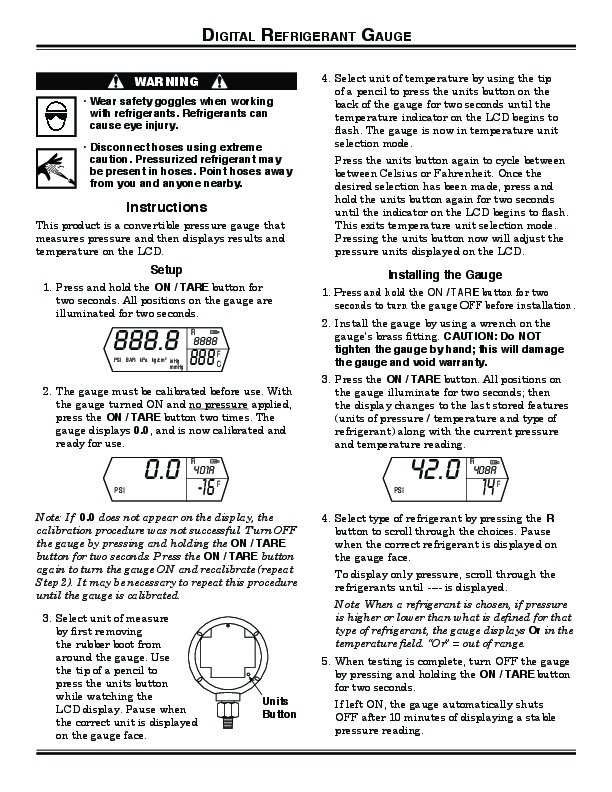
Digital RefRigeRant gauge WARNING · Wear safety goggles when working with refrigerants. Refrigerants can cause eye injury. · Disconnect hoses using extreme caution. Pressurized refrigerant may be present in hoses. Point hoses away from you and anyone nearby. This product is a convertible pressure gauge that measures pressure and then displays results and temperature on the LCD. 1. Press and hold the ON / TARE button for two seconds.
Heating, Ventilating and Air Conditioning User Manual Free Download. HAVC Operator’s Manual. Auto AC Free Instruction Manual Download PDF.
All positions on the gauge are illuminated for two seconds. 4. Select unit of temperature by using the tip of a pencil to press the units button on the back of the gauge for two seconds until the temperature indicator on the LCD begins to flash. The gauge is now in temperature unit selection mode. Press the units button again to cycle between between Celsius or Fahrenheit. Once the desired selection has been made, press and hold the units button again for two seconds until the indicator on the LCD begins to flash. This exits temperature unit selection mode. Pressing the units button now will adjust the pressure units displayed on the LCD. 1. Press and hold the ON / TARE button for two seconds to turn the gauge OFF before installation. 2. Install the gauge by using a wrench on the gauge’s brass fitting. cAuTION: Do NOT tighten the gauge by hand; this will damage the gauge and void warranty. Instructions Setup Installing the Gauge 888.8 2 R PSI BAR kPa kg/cm inHg mmHg 888 8888 F C 2. The gauge must be calibrated before use. With the gauge turned ON and no pressure applied, press the ON / TARE button two times. The gauge displays 0.0, and is now calibrated and ready for use. PSI 0.0 3. Press the ON / TARE button. All positions on the gauge illuminate for two seconds; then the display changes to the last stored features (units of pressure / temperature and type of refrigerant) along with the current pressure and temperature reading. R 401A -16 F PSI 42.0 R 408A 14 F Note: If 0.0 does not appear on the display, the calibration procedure was not successful. Turn OFF the gauge by pressing and holding the ON / TARE button for two seconds. Press the ON / TARE button again to turn the gauge ON and recalibrate (repeat Step 2). It may be necessary to repeat this procedure until the gauge is calibrated. 3. Select unit of measure by first removing the rubber boot from around the gauge. Use the tip of a pencil to press the units button while watching the LCD display. Pause when the correct unit is displayed on the gauge face. 4. Select type of refrigerant by pressing the R button to scroll through the choices. Pause when the correct refrigerant is displayed on the gauge face. To display only pressure, scroll through the refrigerants until – is displayed. Note: When a refrigerant is chosen, if pressure is higher or lower than what is defined for that type of refrigerant, the gauge displays Or in the temperature field. “Or ” = out of range. 5. When testing is complete, turn OFF the gauge by pressing and holding the ON / TARE button for two seconds. If left ON, the gauge automatically shuts OFF after 10 minutes of displaying a stable pressure reading. units Button Digital RefRigeRant gauge Operating Temperature Storage Temperature Measurement Units Operating Range Low Pressure Gauge High Pressure Gauge Accuracy Low Pressure Gauge High Pressure Gauge Both Gauges Resolution Low Pressure.